
WinMerge is an exceptionally useful and open source differencing and merging tool for Windows.
There are many times that understanding the differences between a set of files or folders is critical to making sure that just the right operations are done. Especially true for IT professionals, as working with configuration files can lead to issues if making the wrong change. It is here where WinMerge excels in understanding the differences and merging changes as appropriate.
What can WinMerge Do?
Over time WinMerge has added many features to make it easy to compare files and folders. Some of the features are outlined below.
- 3-way file comparison
- Visual differencing and merging of text files
- Moved lines detection
- Location pane showing map of files compared
- Handles a variety of file formats (Windows, Unix, and Mac)
- Regular expression-based file filters for folder comparisons
- Fast comparison using file sizes and dates
- Image comparisons by highlighting differences with blocks
- Create patch files
- Shell Integration
Comparing Files
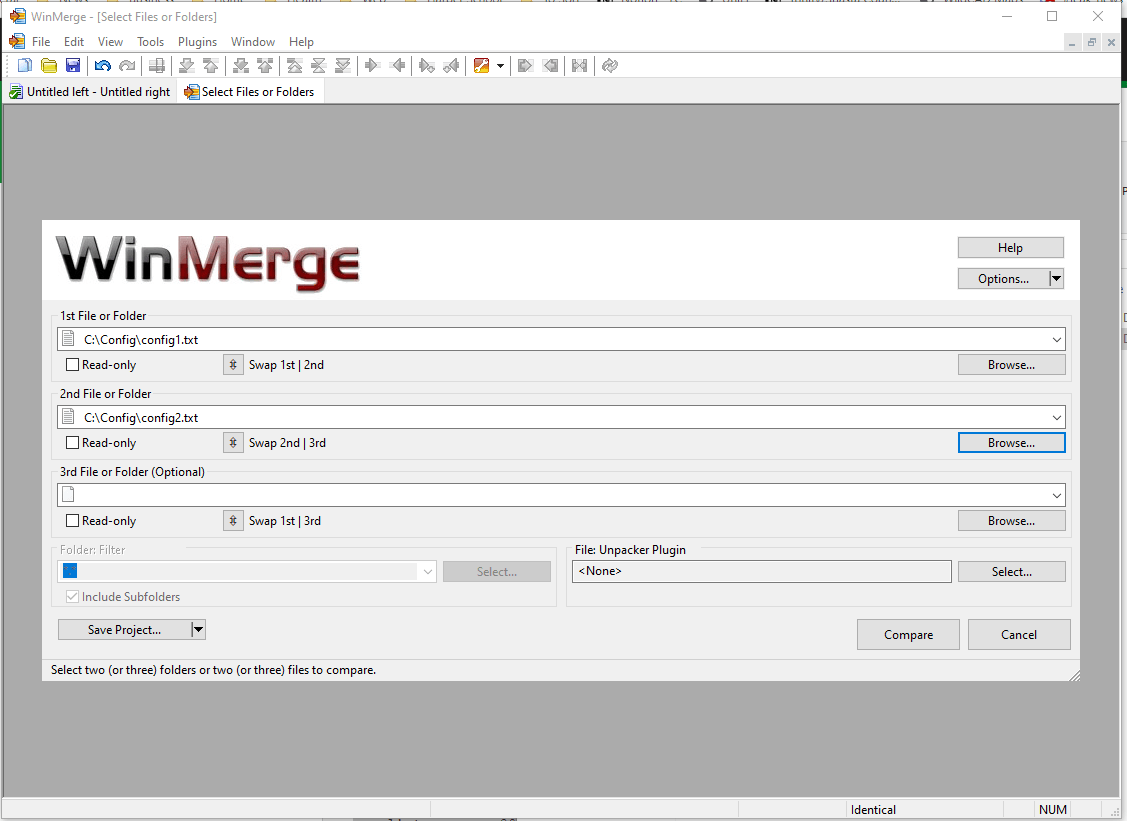
Once you open up WinMerge, you will be presented with the ability to open two files or folders, a left and right side. It is here that you can open up two files to compare the differences. As you can see from the screenshot below, I am choosing a file to show on the left-hand side and a second file to compare the first two on the right-hand side. Although WinMerge recently introduced a 3-way file compare, we are only going to look at a two-way compare here. Once your files are entered, select Compare.
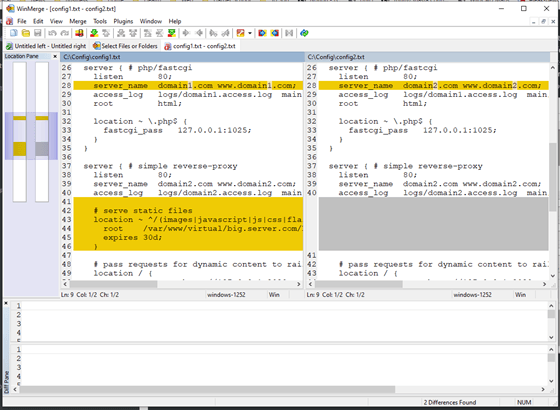
Once the files are loaded, you will see that there are yellow sections that highlight the differences between the files. These are easy to see because of the minimap shown on the left-hand side. In our example below, there is a section missing from the right-hand config2.txt file. Instead of shifting all of the following lines down and marking the rest of the file as changed, WinMerge is smart enough to detect the changed lines and show that only that section has changed.
Merging Changes
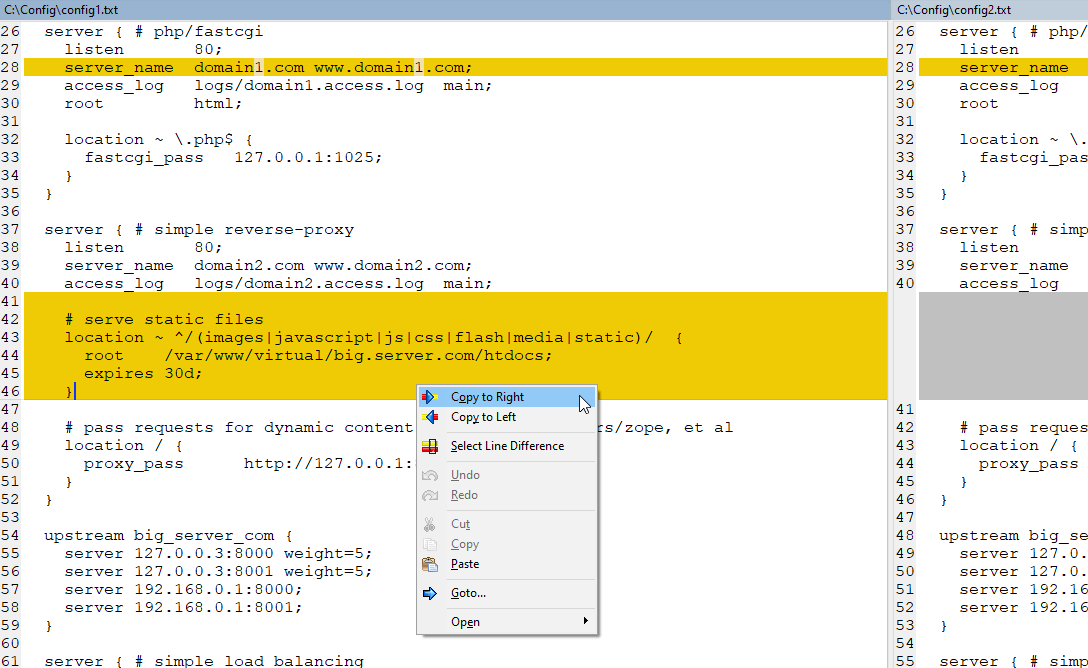
What if we wanted to merge changes from the left-hand file to the right-hand file? This is very simply done by right-clicking on the changes you want to merge and selecting the direction to merge them. In this case, we will merge left, and the changes are then copied over to the right-hand file.
Comparing Folders
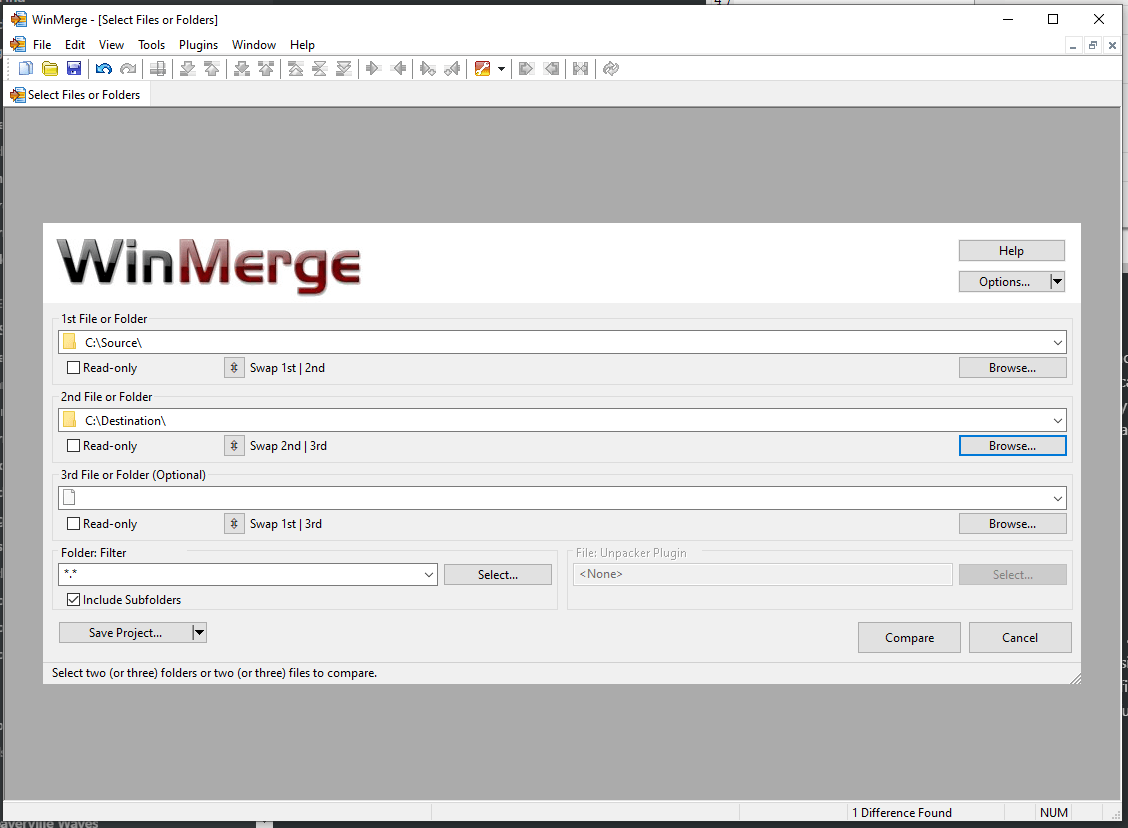
Comparing files is convenient, but oftentimes we need to know the difference in a folder structure as well. If there are changed files within that folder, then we can see those differences and compare them directly within WinMerge to then merge or sort out any changes that may be necessary. To do this, we open up the same Select Files or Folders dialog box, and instead of choosing a specific file, we will choose two different folders.
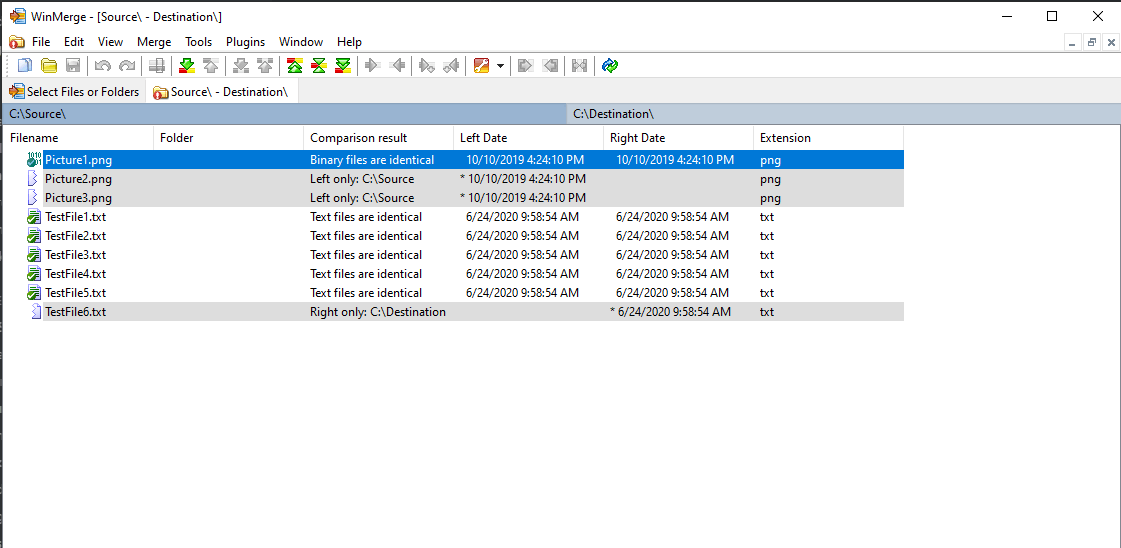
What’s different about the resulting view is that there is one large list of files instead of left and right-hand side views. For each file, there will be a designation, such as the following:
- Left Only:
- Right Only:
- Text files are identical
- Binary files are identical
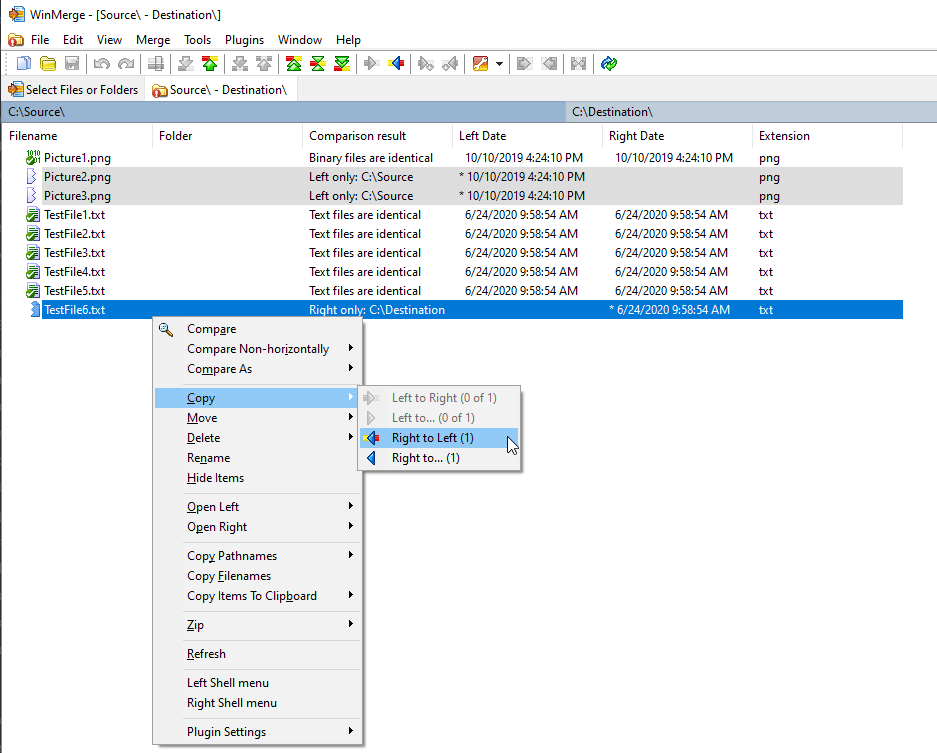
If we wanted to copy a file from a certain folder to another, such as this TestFile6.txt from the right-hand side to the left-hand, we can simply use one of the many options in the right-click menu. In this case, we will choose Right to left (#).
Creating Filters
One of the most frustrating aspects of comparing files or folders, at times, is when there is a set of files that you do not want to include in the comparison. A common problem with this is version control directories. For example, the GIT version control system creates a .git folder that contains a large number of files that may have no relevance on what you are trying to compare. To remove this from the comparison, we would need to filter out those files within WinMerge when choosing the folders for comparison.
WinMerge uses .flt files for custom filters. The format is pretty straightforward and allows a good amount of flexibility. An example of a source control filter file is below.
name: Exclude GIT Source Control
desc: Exclude GIT files and directories

def: include

d: \\\.git$
This looks very simple, but let’s break down what is happening here. There are four lines that are basically the minimum needed to make this filter work.
- name - This is the name of the filter, as displayed in the filter list
- desc - A description that gives a bit more information as to what the filter is doing
- def - Whether this is an inclusive, include, or exclusive, exclude, filter
Inclusive means that it will include all files that do not match a filter, whereas exclusive means that only those items that are explicitly matched.
Finally, there is one last line, and arguably the most important one. That is the actual line that defines the filter itself. In this case, we are noting that we want to filter out a directory designated by the d: syntax. Next, we want to exclude the .git directory but due to the “\” and “.” being control characters, these need to be escaped.
To do this, we use one slash to escape the “.” and another to escape the slash we just used, and finally to note the beginning of the pattern, we use the same slash. That is why there is a strange-looking triple-slash syntax for a folder beginning with a “.”.
Install this filter using the filter menu, and then upon choosing this filter, you will find that the .git folders are excluded from your comparisons!
Conclusion
As you can tell, WinMerge is an easy to use and powerful file and folder comparison tool. Well worth adding to an IT professionals arsenal of tools, this consistently updated open-source Windows tool is indefensible not to use. Especially with the new 3-way file comparisons and new image comparison features, WinMerge becomes even more powerful and useful!