
In this article, you will learn about Azure Automation Assets. You will also learn how to add assets to your automation account that your runbooks can then use at runtime.
In the previous article, you’ve learned how to create your first Azure Automation Runbook containing just a simple Write-Output code. If you haven’t read the previous articles in this series yet, I highly recommend you to go back and read it first to catch up with the progress.
Part 1: Getting Started with Azure Automation: Introduction
Part 2: Getting Started with Azure Automation: Creating your first Azure Automation RunBook
The assets that will be created in this article will be in preparation for a sample automation project that performs the following tasks:
- Run every Monday at 6:00 AM
- Login to Azure
- Get the list of Virtual Machines and their Power State
- Send the report as an email to a nominated recipient address
This sample automation project will be discussed further in the next article. For now, let’s talk about assets and start creating them.

What Are Azure Automation Assets?
As a point of reference, in a normal PowerShell script, you can create a text file in any directory with data in it. And in turn, your script can import the data from that text file during runtime. This file is essentially considered an asset.
In Azure, automation assets are used to store persistent data. This means that once an asset is created, its value can be called upon by the runbook at every execution.
The difference is that assets are stored in containers instead of another file lying around inside your computer. This, in turn, makes assets much more secure and reliable. This is beneficial especially when you are dealing with storing credentials or secret texts.
What Are the Different Types of Automation Assets
In this article, we will use three automation assets. Each of these asset types is briefly defined in the list below.
Variable
 Variable acts just the same as the variables that you would use in your normal PowerShell scripts. But, instead of defining them inside your script or code, the values are stored inside a variable asset in Azure Automation.
This way, variables can also be encrypted so that not just anyone who can see this asset can read its value. Variables can be assigned types including string, DateTime, integer, boolean and not specified.
Credential
 Credential is a special type of variable specifically designed to store a username and password pair. Using this type of asset eliminates the risk of exposing credentials that are usually hard-coded into scripts or text files.
Schedule
 Schedule is used to trigger a runbook at a fixed or recurring point in time. For example, you can create a schedule asset to execute a runbook every Friday of the week at 6:00 AM.
Creating Azure Automation Assets
In this section, I will show you how to create a variable, credential and schedule assets by using the Portal and PowerShell.
How To Add Automation Assets Using The Portal
Add a Variable Asset using the Portal
NOTE: The variable to be added will contain the email address of the recipient of the report that will be produced by the runbook.
- Navigate to the Azure Automation Account. In my environment, the automation account name is Azure-AA.
- On the left pane, under the Shared Resources section, click on Variables.
- Then click on Add a variable.
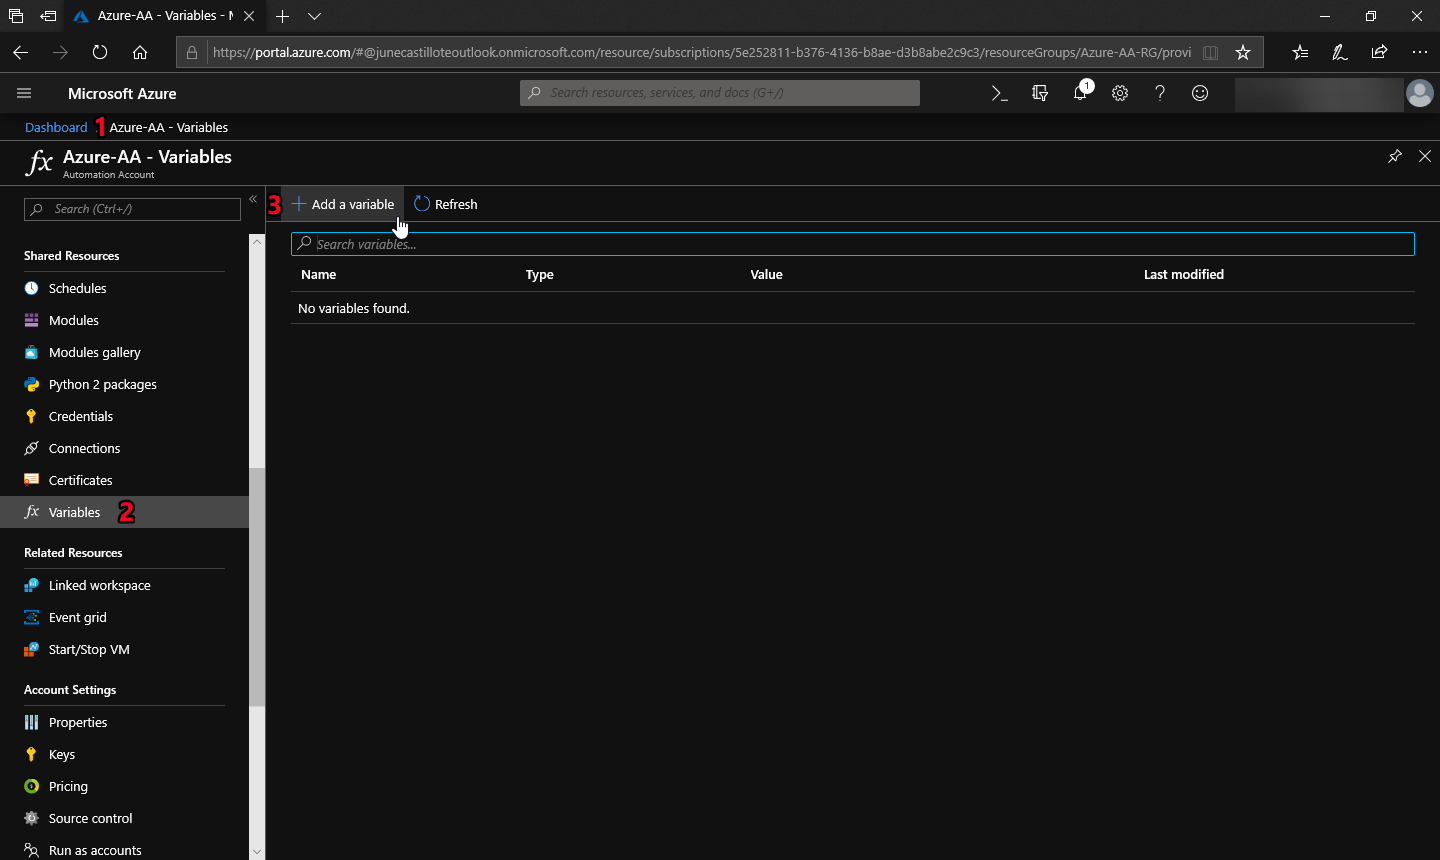
Click on the Add a variable button.
The New Variable form appears on the right side of the portal.
- Give the variable a name. This can be any name that would make sense to you or its purpose. In my project, I’m naming the variable ReportRecipients.
- Add description.
- Select the type as a string.
- Leave the Encrypted value as No.
- Click Create.
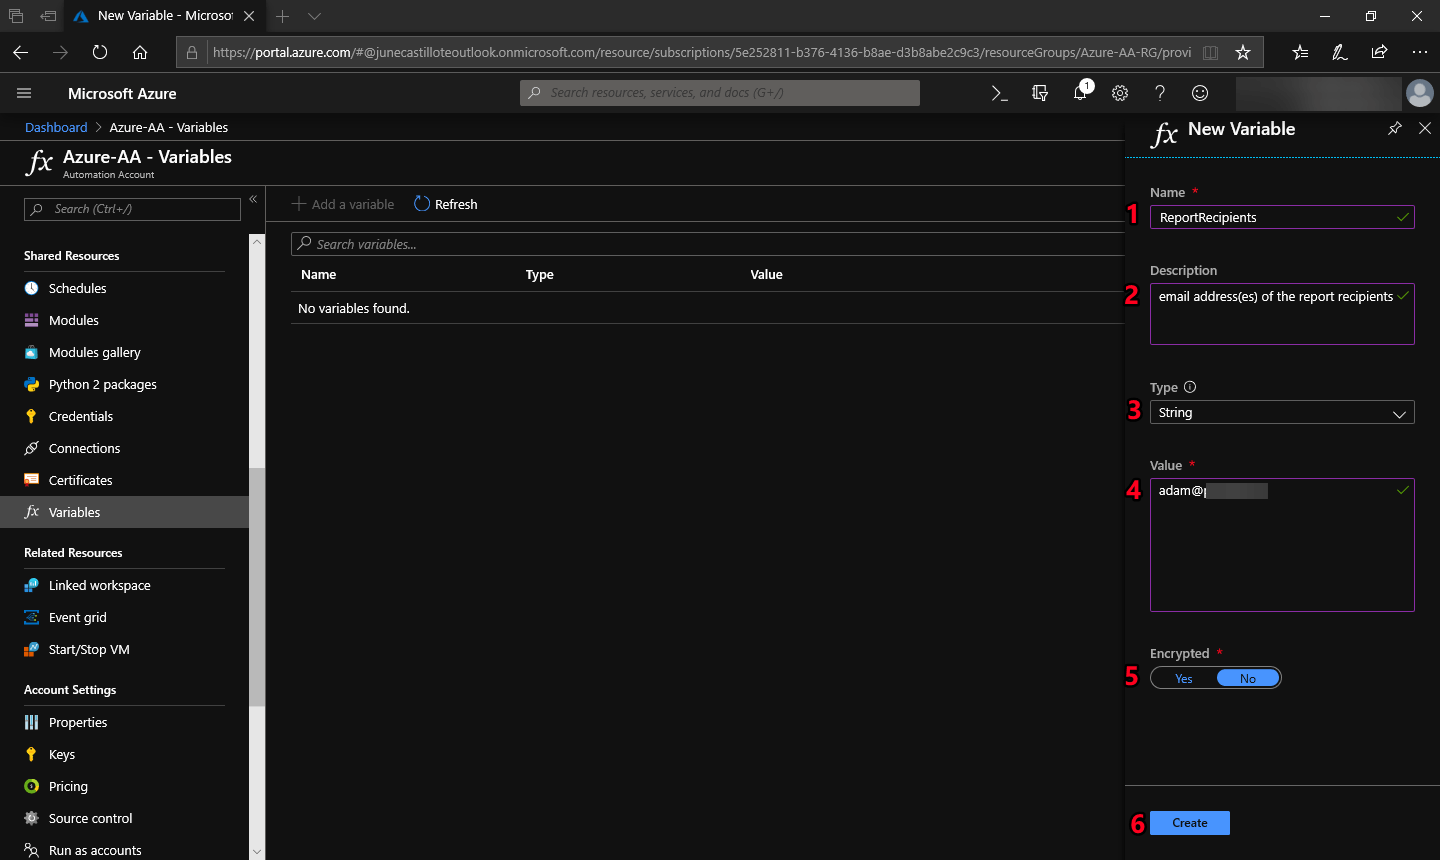
The New Variable form - complete the required details.
Once the variable is created, you will see the variable listed similar to the screenshot below.
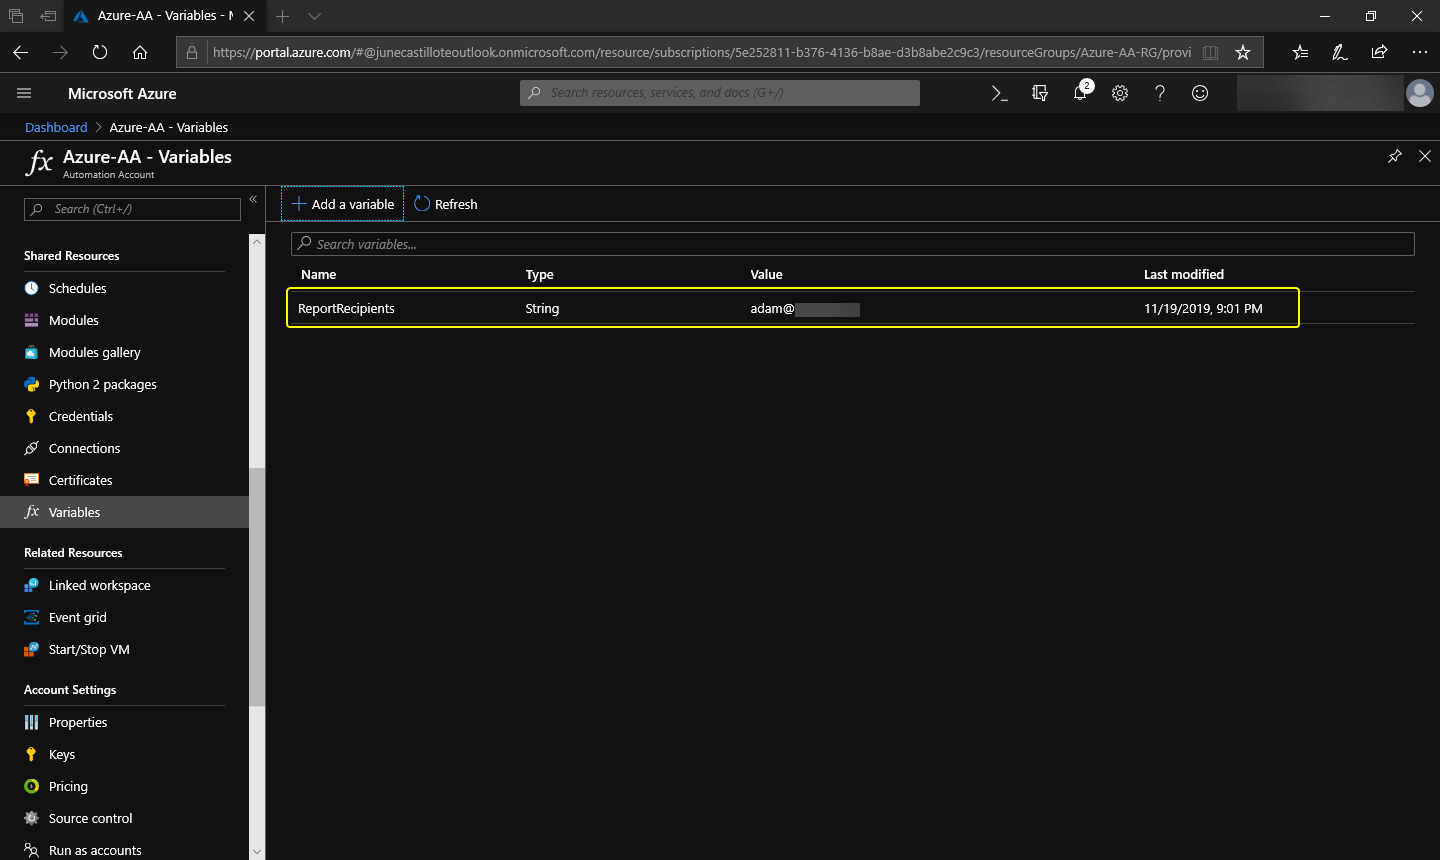
The new variable is created.
Add a Credential Asset using the Portal
NOTE: The credential that will be created must have access to Azure to retrieve data. The account must also have an Office 365 mailbox because it will be used to send the report through email.
- Navigate to the Azure Automation Account.
- On the left pane, under the Shared Resources section, click on Credentials.
- Then click on Add a credential.
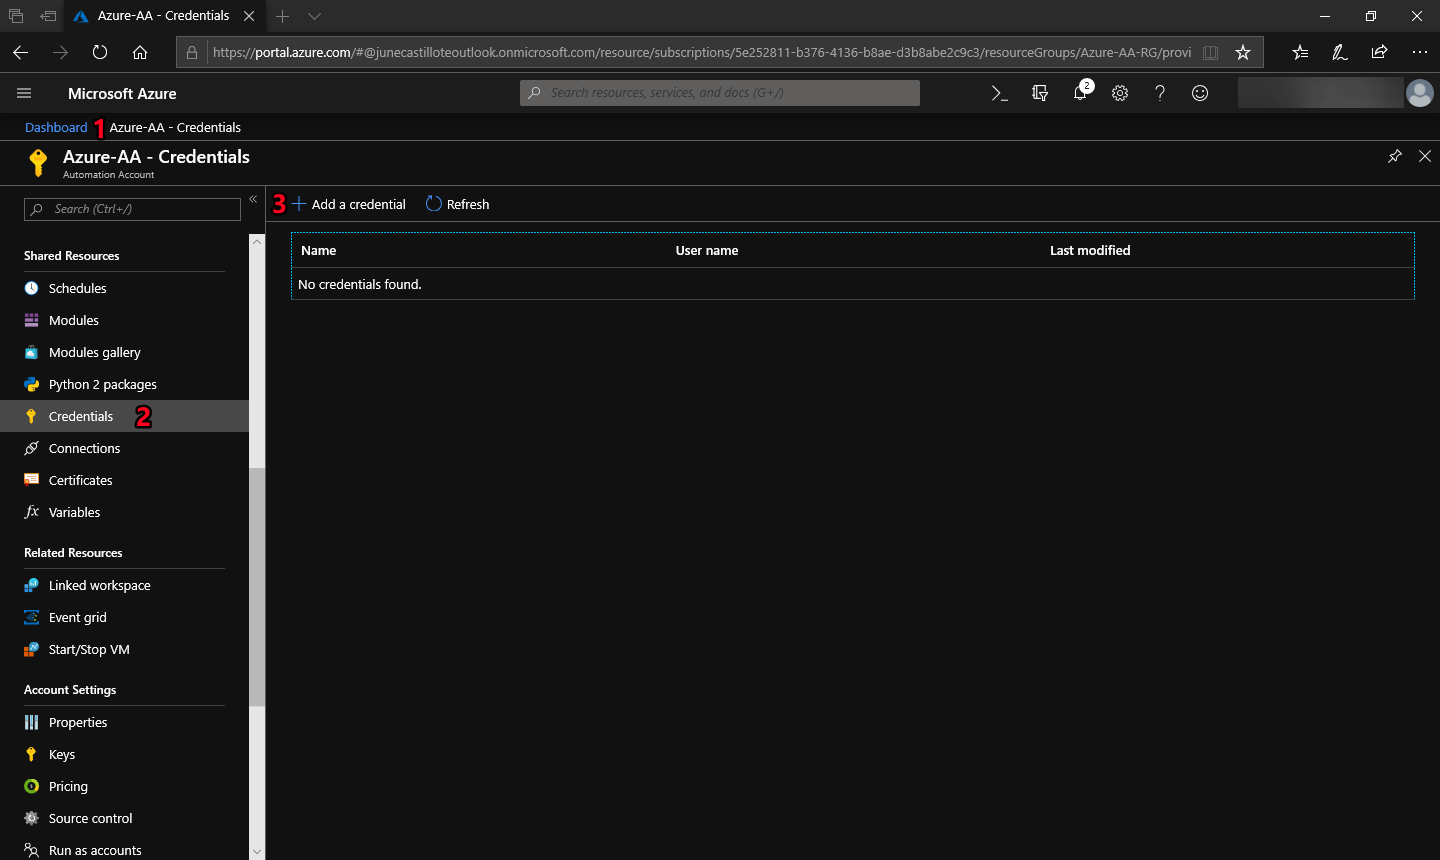 Click the Add a credential button.
The New Credential form appears on the right side of the Portal.
- Give the credential a name. In my environment, I am using the name ServiceAccount
- Add a description. (Optional)
- Fill in the user name.
- Type in the password.
- Confirm the password.
- Click Create.
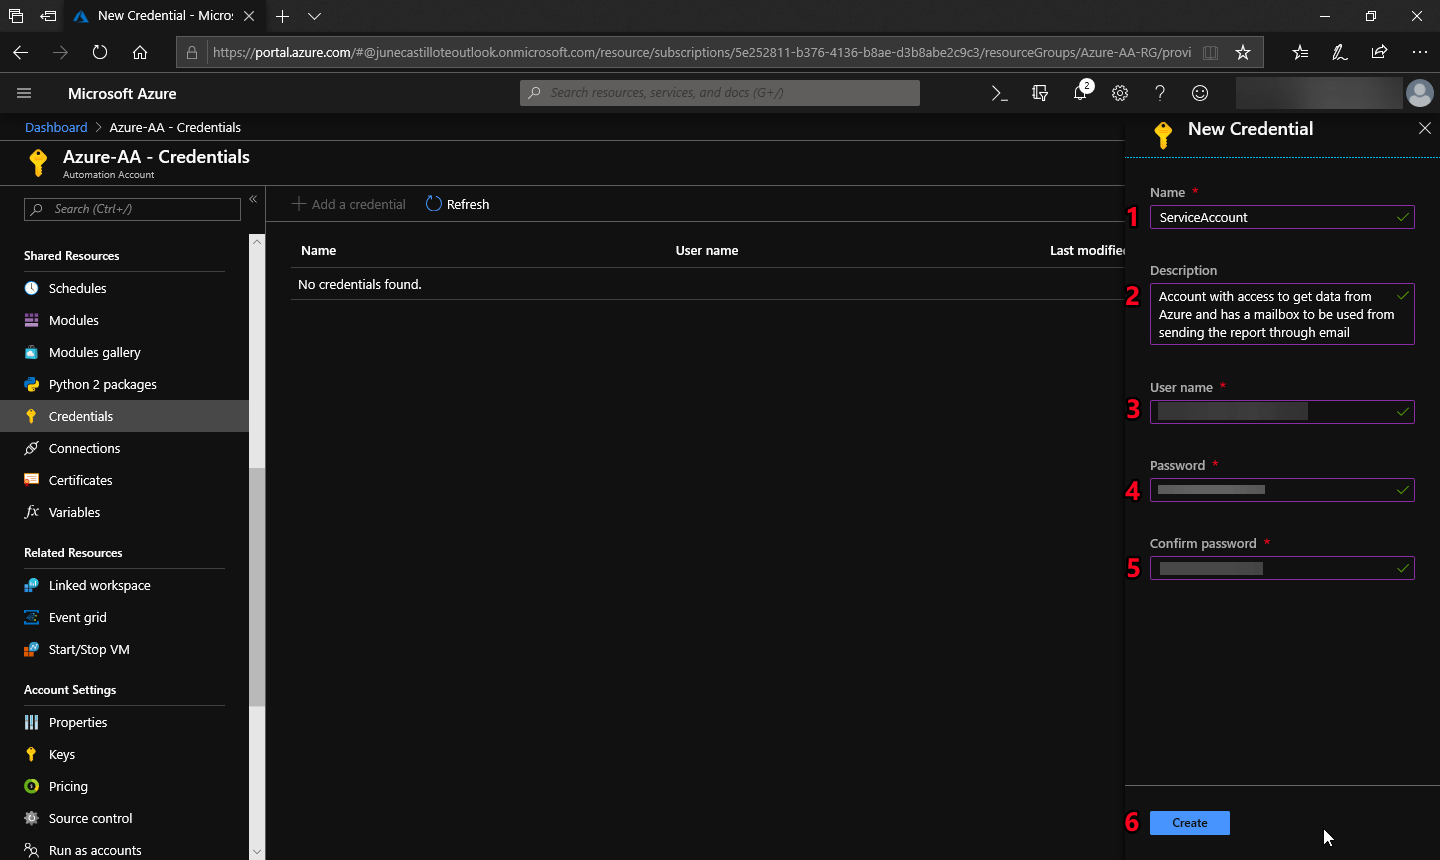 The New Credential form - complete the required details.
Once the credential is created, you will see the credential listed similar to the screenshot below.
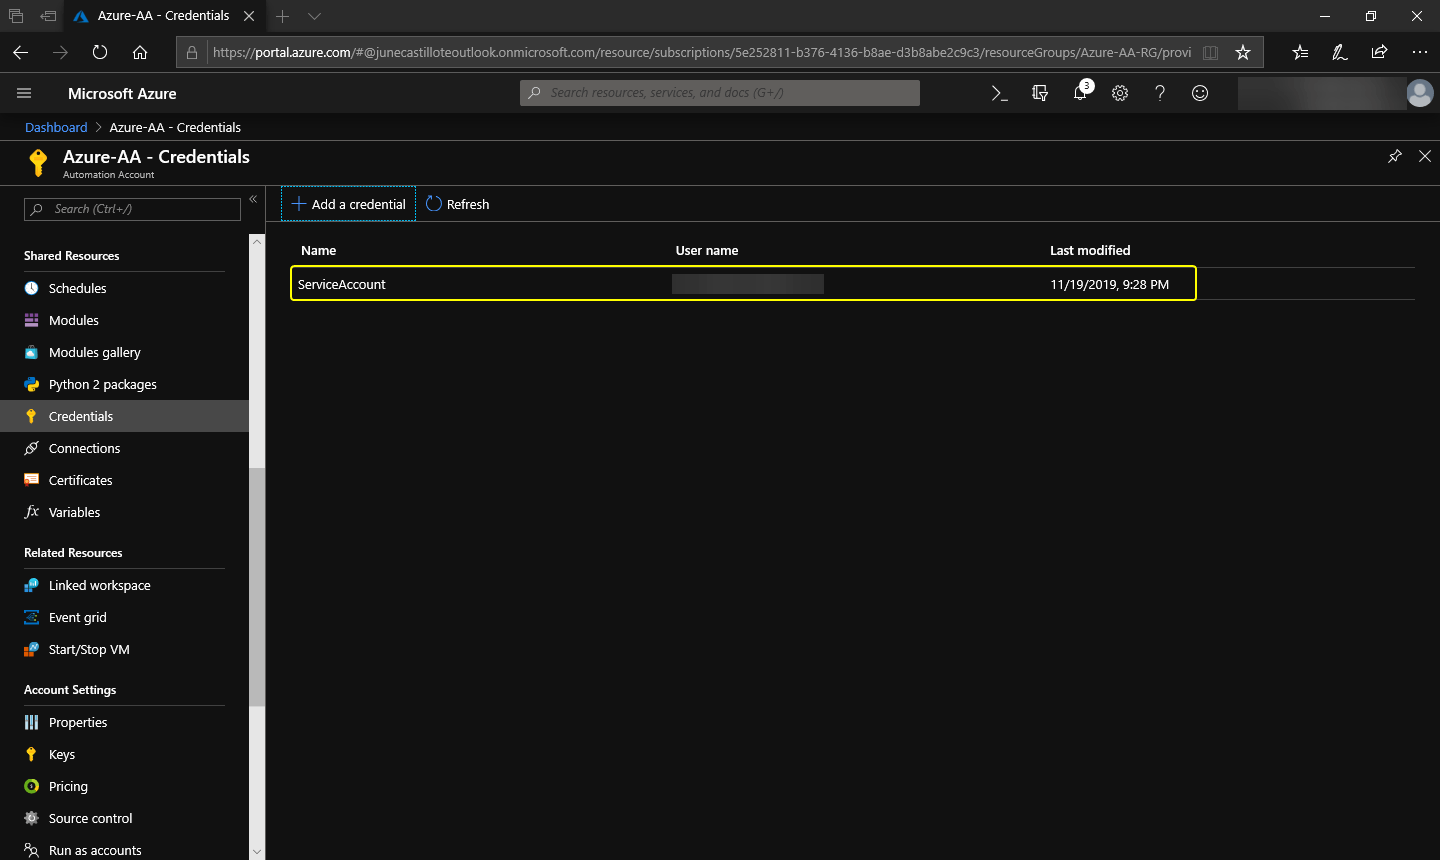
The new credential is created.
Add a Schedule Asset using the Portal
NOTE: The schedule asset to be created will be used to execute the runbook every Monday at 6:00 AM
- Navigate to the Azure Automation Account.
- On the left pane, under the Shared Resources section, click on Schedules.
- Then click on Add a schedule.
 Click the Add a schedule button.
The New Schedule form appears on the right side of the Portal.
- Give the schedule a name. In my environment, I am using the name EveryMondayAtSix
- Add a description. (Optional)
- Select the initial start date and time.
- Select the appropriate Time Zone.
- Set the Recurrence value to Recurring
- Change the recurrence to every 1 week.
- Put a check on Monday
- Click Create
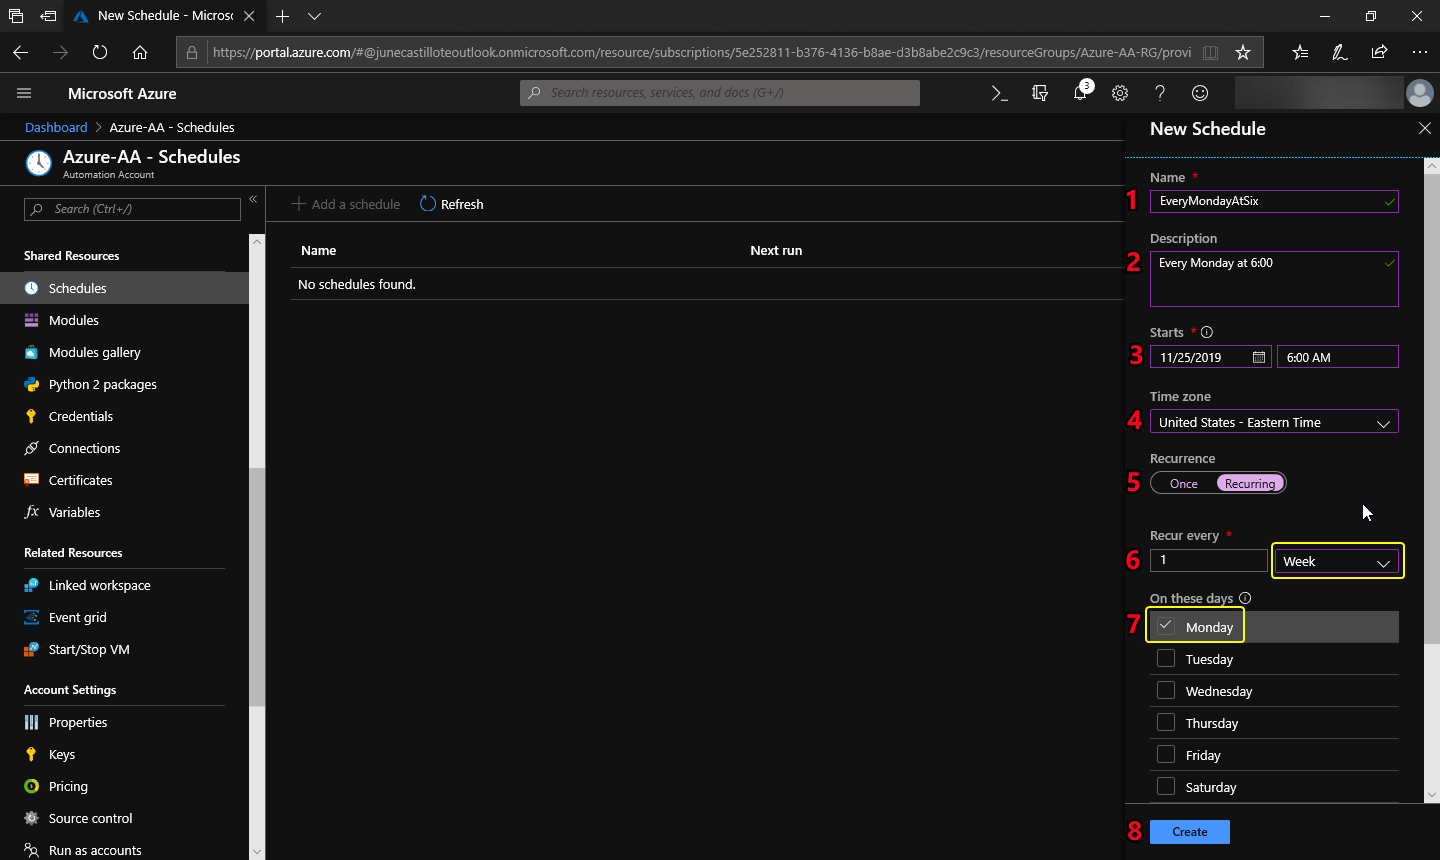
The New Schedule form - complete the required details.
Once the schedule is created, you will see the schedule listed similar to the screenshot below.
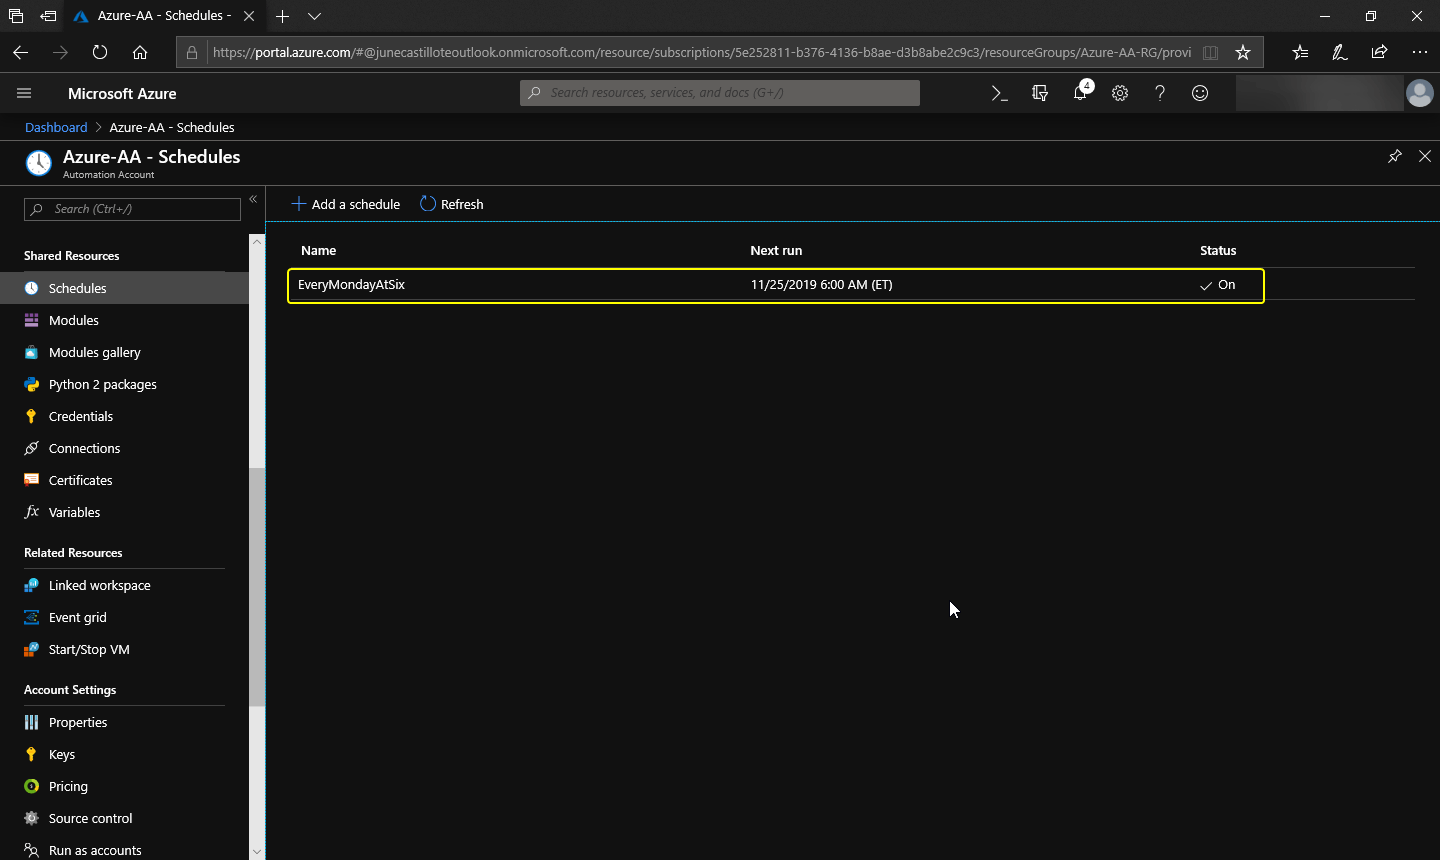
The new schedule is created.
How to Add Automation Assets using PowerShell
Add a Variable Asset using PowerShell
NOTE: The variable to be added will contain the email address of the recipient of the report that will be produced by the runbook.
- Connect to Azure using PowerShell (if not yet connected)
- Copy the command below and paste it in your PowerShell console. Make sure to change the email address in the Value
New-AzAutomationVariable
    -Name 'ReportRecipients'
    -ResourceGroupName 'Azure-AA-RG'
    -AutomationAccountName 'Azure-AA'
    -Value '[email protected]'
    -Encrypted $false
The code above will create the Variable under the name of ReportRecipients with the value of the email address and will be created inside the automation account Azure-AA that belongs to the resource group Azure-AA-RG. And the variable will not be encrypted.
Once completed, a similar output to the screenshot below will be shown which indicates that the variable has been created.
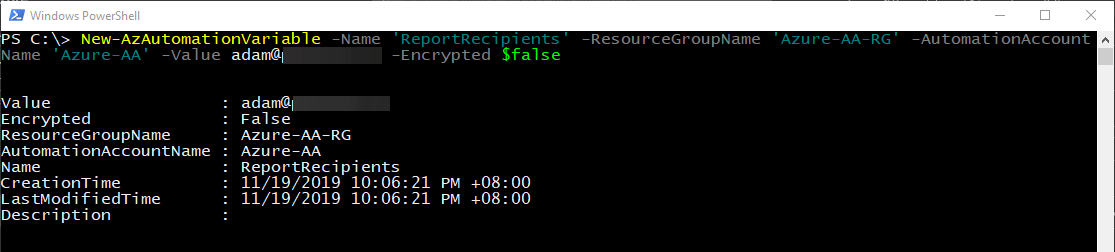 New variable is created.
Add a Credential Asset using PowerShell
NOTE: The credential that will be created must have access to Azure to retrieve data. The account must also have an Office 365 mailbox because it will be used to send the report through email.
- Connect to Azure using PowerShell (if not yet connected)
- Copy the command below and paste it in your PowerShell console. Make sure to change the values of the username and password values first.
# Specify the username
$username = "USERNAME"

# Specify the password
$password = ConvertTo-SecureString -String "PASSWORD" -AsPlainText -Force

# Convert username and password strings into a credential object
$credential = [pscredential]::new($username,$password)

# Create the Credential Asset
New-AzAutomationCredential
    -Name 'ServiceAccount'
    -Value $credential
    -ResourceGroupName 'Azure-AA-RG'
    -AutomationAccountName 'Azure-AA'
The code above will create the credential asset under the name ServiceAccount inside the automation account Azure-AA which belongs to the resource group Azure-AA-RG
Once completed, a similar output to the screenshot below will be shown which indicates that the credential has been created.
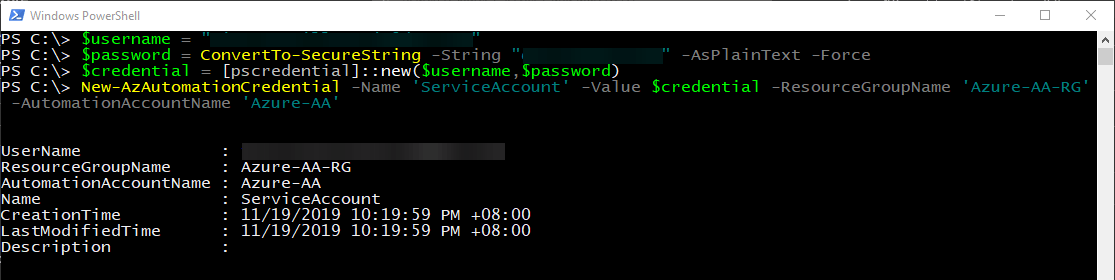 New credential is created.
Add a Schedule Asset using PowerShell
NOTE: The schedule asset to be created will be used to execute the runbook every Monday at 6:00 AM
- Connect to Azure using PowerShell (if not yet connected)
- Copy the command below and paste it in your PowerShell console. Make sure to change the values as needed.
# Build the schedule parameters
$azSchedule = @{
    Name = 'EveryMondayAtSix'
    TimeZone = 'Eastern Standard Time'
    StartTime = (Get-Date '11/25/2019 06:00:00 -05:00')
    DaysOfWeek = 'Monday'
    WeekInterval = 1
    ResourceGroupName = 'Azure-AA-RG'
    AutomationAccountName = 'Azure-AA'
}
# Create the schedule
New-AzAutomationSchedule @azSchedule
The $azSchedule block is where the parameters for the schedule is compiled. The schedule is named EveryMondayAtSix, the start time value is set to November 25 at 6:00 AM (Eastern Standard Time) and repeated weekly every Monday. The schedule is created inside the automation account Azure-AA that belongs to the resource group Azure-AA-RG
NOTE: The StartTime offset value must coincide with the TimeZone offset value.
Example: If the TimeZone is ‘Eastern Standard Time’ which has an offset of -5:00, the StartTime parameter must include the same offset value (eg. 11/25/2019 06:00:00 **-05:00**)
Once completed, a similar output to the screenshot below will be shown which indicates that the schedule has been created.
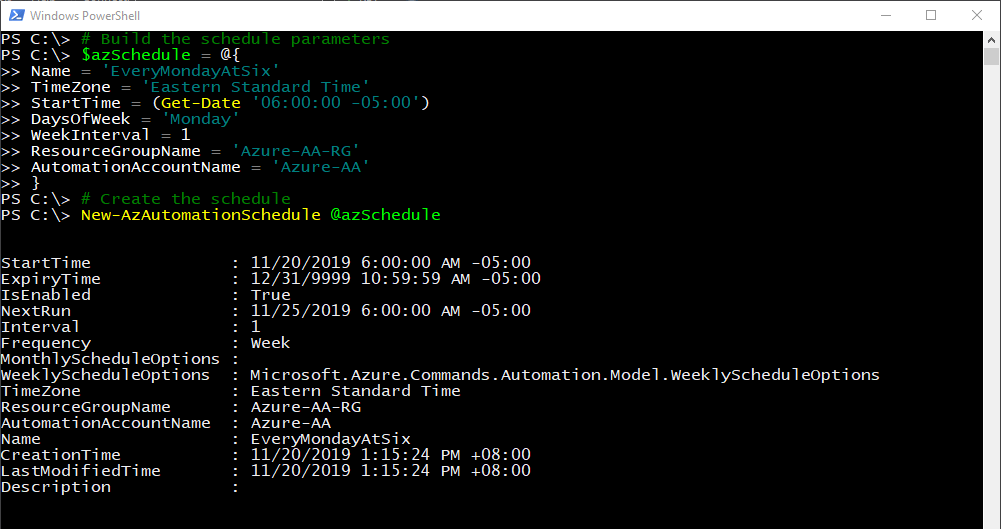 New schedule is created.
Summary
In this article, you have learned what Azure Automation Assets are and the different types available. You have also learned how to create different kinds of assets such as variables, credentials, and schedules by using the Portal and PowerShell.
In the next article, we will create a sample automation project that will use these assets using the runbook code at runtime.
Thank you for reading and stay tuned!